
Desserts
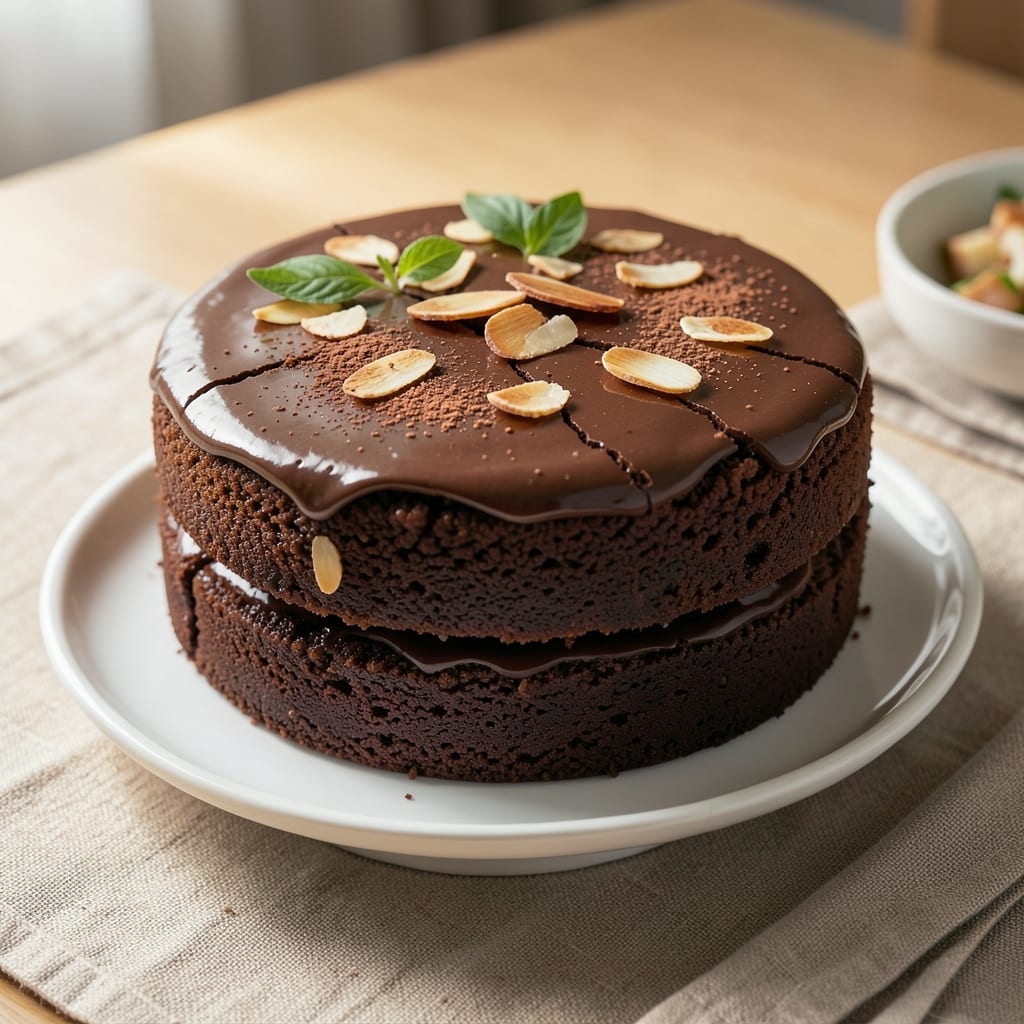
This almost flourless chocolate cake delivers the same decadent, fudgy texture as its classic counterpart—but with just a touch of gluten-free flour for structure. 💛 The secret lies in using almond flour and eggs to create a rich, moist crumb that stays tender without crumbling. I developed this version after struggling to find a gluten-free chocolate cake that didn’t turn dense or dry.
The beauty of this recipe is its versatility. While it’s gluten-free, the small amount of flour ensures a stable cake that holds its shape while still delivering that signature flourless depth. The cake bakes up with a glossy, crackly top and a velvety interior that melts in your mouth—no grittiness here. It’s the perfect balance between structure and indulgence.
What sets this apart is how it handles moisture. The combination of melted butter, dark chocolate, and eggs creates a fudgy, almost mousse-like texture, while the almond flour adds natural richness. This cake is ideal for special occasions or when you crave something decadent but still want to avoid gluten.
Serve it warm with vanilla ice cream or a dusting of powdered sugar for an elegant dessert that feels like a restaurant-quality treat. The recipe includes tips for adjusting the texture, so you can make it even richer or slightly lighter depending on your preference.
Ingredients for almost flourless chocolate cake
Here's what transforms classic chocolate cake into a gluten-free, fudgy masterpiece.
| Ingredient | Amount | Notes |
|---|---|---|
| Dark Chocolate Bars 🍫 | 8 oz | High-quality, 70% cocoa minimum |
| Unsalted Butter 🧈 | 1 cup | Melted, full-fat preferred |
| Large Eggs 🥚 | 4 whole | Room temperature, extra-large |
| Almond Flour 🌰 | 1 ½ cups | Finely ground, blanched almonds |
| Gluten-Free All-Purpose Flour 🌾 | ¼ cup | Fine grind, Bob's Red Mill |
| Granulated Sugar 🍚 | 1 ½ cups | White or light brown |
| Vanilla Extract 🌿 | 1 tbsp | Pure Madagascar bourbon |
| Instant Espresso Powder ☕ | 1 tsp | For deep chocolate flavor |
| Salt 🧂 | ½ tsp | Fine sea salt, Diamond Crystal |
| Baking Powder 🍞 | ½ tsp | Aluminum-free preferred |
| Powdered Sugar 🍚 | ¼ cup | For dusting, optional |
| Rum Extract 🍹 | 1 tsp | Optional, for depth |
The chocolate and butter are non-negotiable here. Valrhona or Guittard bars melt like silk, but Ghirardelli squares work too—just chop them finely for even melting. Butter should be unsalted and full-fat (the good stuff, not margarine). I always grab my chocolate from Whole Foods or Trader Joe's—their bulk bins have the freshest stock. Pro tip: melt the chocolate and butter together gently (double boiler or microwave in 20-second bursts) to avoid seizing. The almond flour? Bob's Red Mill is my go-to brand—it's finely ground and adds that perfect nutty richness without grit.
No almond flour? Substitute with 1 cup finely ground walnuts, but expect slightly more texture. Running low on gluten-free flour? Oat flour works at 1:1 ratio, though the cake may be denser. The espresso powder is key for that deep chocolate flavor—if you don't have it, 1 tsp instant coffee works in a pinch. For the eggs, room temperature is crucial (cold eggs can cause cracks). Want to make this richer? Add 2 tbsp sour cream to the batter. The rum extract? Only if you're feeling fancy—Kahlúa or spiced rum both work beautifully.
This cake keeps beautifully—3 days at room temperature in an airtight container, or 1 week refrigerated. For best texture, serve at room temperature (30 minutes out of the fridge). Leftovers? Slice and freeze for up to 3 months—thaw overnight in the fridge. The powdered sugar dusting is optional but adds that restaurant-quality finish. Store-bought gluten-free flours? Use within 3 months for best results, and keep them sealed tight to prevent moisture.
Why You'll Love This Recipe
- No Mixer Needed: I swear by this recipe when I’m too tired to pulse nuts or sift flours. Melt the butter, chop the chocolate, and fold in the eggs—no fancy equipment, just a bowl and a spatula. Honestly, the almond flour keeps it light without the effort of grinding fresh.
- Rich Without Overpowering: That first bite? Deep chocolate but not bitter—thanks to the dark chocolate bars and just a touch of gluten-free flour for structure. The eggs add this secret creamy texture, so it’s not too dense or too sweet. (Yes, even my picky husband finishes his slice.)
- Weeknight or WOW Factor: Make it for a quick dinner with ice cream or save it for a fancy dessert. The cake holds up well at room temp, so I’ve served it at potlucks, last-minute date nights, and—fine, I’ll admit it—after a long day when I needed a treat. It’s that kind of reliable.
- Budget-Friendly Luxury: I use whatever dark chocolate I have on hand (the cheaper the bar, the more I can slice), and the butter and eggs stretch further than you’d think. Leftovers? They actually taste better the next day—moist and fudgy, like a secret. (Between us, this is my go-to for when I want to feel fancy without breaking the bank.)
Step-by-step instructions for almost flourless chocolate cake
Here's how to bake a decadent, gluten-free chocolate cake that's rich, fudgy, and nearly flourless.
🍳 Step 1: Melt Chocolate and Butter for a Silky Base
In a heatproof bowl set over a saucepan of simmering water, combine the 8 oz dark chocolate bars and 1 cup unsalted butter. Stir gently until completely melted and smooth, then remove from heat. Let cool slightly—about 5 minutes—so the mixture is warm but not scorching when you add the eggs.
This double boiler method ensures the chocolate melts evenly without seizing. If you notice any graininess, stir in a splash of warm water to smooth it out. The goal is a glossy, velvety mixture that will create that signature fudgy texture.
👨🍳 Step 2: Whisk Eggs and Sugar to Peak Volume
In a separate large bowl, whisk together the 4 whole large eggs and 1.5 cups granulated sugar over a double boiler until the mixture triples in volume and becomes pale, thick, and ribbon-like—about 5-7 minutes. This step is crucial for creating that light, airy texture despite the low flour content.
I like to test the readiness by lifting the whisk—if the ribbon holds its shape for a few seconds before dissolving, it's ready. Add the 1 tbsp vanilla extract, 1 tsp instant espresso powder, and 1 tsp rum extract now while the mixture is still warm. These flavorings will infuse perfectly into the egg mixture.
🥘 Step 3: Combine Wet and Dry Ingredients Gently
Gradually pour the melted chocolate mixture into the egg mixture while whisking constantly on low speed. The batter will thicken noticeably as it comes together. In a separate bowl, whisk together the 1.5 cups almond flour, 0.25 cup gluten-free all-purpose flour, 0.5 tsp salt, and 0.5 tsp baking powder. Sift this dry mixture over the chocolate mixture and fold gently with a spatula until just combined.
Here's the thing—don't overmix. You want to maintain as much air as possible in the batter. The almond flour gives structure while keeping the cake tender, and the tiny amount of gluten-free flour helps with rise. The batter should be thick but pourable, like heavy pudding.
🔥 Step 4: Bake in Prepared Pans for Perfect Rise
Preheat your oven to 350°F. Generously grease two 8-inch round cake pans with butter or line them with parchment paper. Divide the batter evenly between the pans and smooth the tops. Bake for 35-40 minutes until a toothpick inserted in the center comes out with moist crumbs but no wet batter.
I usually start checking at the 30-minute mark—your oven might run hot, so watch for the edges to pull away slightly from the pan while the center remains slightly underdone. The cake should spring back when gently pressed, with a crackly top crust that's deep brown in color.
⏰ Step 5: Cool and Dust for Ultimate Decadence
Remove the cakes from the oven and let them cool in the pans for 10 minutes, then transfer to a wire rack to cool completely. Once fully cooled, dust the tops generously with the 0.25 cup powdered sugar using a fine-mesh sieve. This step isn't just for looks—it adds that signature velvety finish and balances the richness.
For the best texture, let the cakes sit at room temperature for at least 2 hours before slicing. This allows the flavors to meld completely and the texture to set properly. Each slice should be dense, fudgy, and rich with chocolate flavor—no dryness here, just pure decadence.
Pro Tips For Making Almost Flourless Chocolate Cake
- Melt Chocolate Slowly: I learned this the hard way—dumping chopped chocolate bars into hot butter and expecting instant magic usually means seizing or streaks. Instead, melt the butter first, then reduce heat to low and add the chocolate in small batches, stirring constantly. The butter shouldn’t be boiling, just warm enough to melt the chocolate smoothly.
- Whisk Eggs Until Ribbon Stage: This isn’t just fluff—it’s what keeps your cake tender. Beat the eggs at room temperature until they form thick ribbons when the whisk is lifted. I used to stop when they looked "done," but they need that extra 30 seconds to fully emulsify. Trust the process, even if your arm feels like it’s about to fall off.
- Skip Overmixing the Dry Ingredients: Almond flour and gluten-free blends are finicky. Once you fold in the dry ingredients, stop mixing the second they’re just combined—no streaks, no clumps. Overworking them turns the batter gummy, and your cake will taste dense. Think "dust it in," not "knead it."
- Bake Until Internal Temp Hits 205°F: The cake will look set earlier, but pull it out at 205°F internal temp (use an instant-read thermometer). I used to eyeball it and end up with a cake that was still gooey in the center. This temp guarantees a firm yet moist crumb—no sad, underbaked middle or dry edges. (Yes, even if it looks done sooner.)
Best sauces and condiments for this almost flourless chocolate cake
Classic Vanilla Bean Sauce
Warm vanilla bean sauce elevates this cake like nothing else. I use 1 cup heavy cream, ½ cup whole milk, ¼ cup granulated sugar, and 1 vanilla bean (split and scraped) simmered until thickened. For extra decadence, add 2 tbsp dark chocolate chips at the end. Serve warm over slices for a luxurious finish that complements the fudgy texture. 🍮
Salted Caramel Drizzle
This is my secret weapon for balancing the richness. Heat 1 cup granulated sugar in a saucepan until amber, then whisk in ½ cup heavy cream and ¼ cup unsalted butter. Finish with a pinch of flaky sea salt and drizzle over the cake. The contrast of salty-sweet makes every bite unforgettable. Store-bought caramel sauce works in a pinch, but homemade tastes 10x better.
Chocolate Ganache
For a true flourless experience, top with chocolate ganache made from 8 oz dark chocolate and ½ cup heavy cream. Heat the cream until steaming, pour over chopped chocolate, then whisk until silky. Let it cool to a spreadable consistency before drizzling. Add 1 tsp espresso powder to the ganache for an even deeper chocolate flavor that pairs perfectly with the cake's espresso notes.
Raspberry Coulis
Bright, tart raspberry coulis cuts through the richness beautifully. Simmer 1 cup fresh raspberries with 2 tbsp sugar until broken down, then strain through a fine-mesh sieve. Chill before serving over cake slices. For extra flair, add a few fresh raspberries on top. This fruity contrast makes the cake feel lighter while enhancing its chocolatey depth.
Whipped Cream Variations
Classic whipped cream (35% cream whipped with powdered sugar) is always a crowd-pleaser, but I love adding ½ tsp vanilla extract and a pinch of cocoa powder for a chocolate twist. For a boozy touch, fold in 1 tbsp Kahlúa coffee liqueur or 1 tsp rum extract. Use a piped rosette for an elegant presentation that feels restaurant-worthy. 💫
Spiced Honey Glaze
For a unique twist, brush the cake with a spiced honey glaze made from ½ cup honey, 1 tsp cinnamon, ½ tsp cardamom, and a pinch of black pepper. Warm gently until smooth, then drizzle over cooled cake layers. The warmth of the spices complements the chocolate while adding an unexpected depth that surprises guests. Perfect for fall or holiday celebrations.
Nutrition facts
Frequently asked questions
Why does this recipe use both almond flour and gluten-free flour?
The almond flour provides natural richness and structure while keeping the cake tender, while the small amount of gluten-free flour ensures proper rise and prevents crumbling. This "almost flourless" approach gives you the best of both worlds—deep chocolate flavor with a stable texture. The almond flour also adds subtle nutty notes that complement the chocolate beautifully.
Can I make this cake without almond flour?
Yes! Substitute with 1 cup finely ground walnuts or 1 cup oat flour (for a gluten-free option). However, the texture will be slightly denser. For the best results, use 1.5 cups of your chosen substitute and add 1 extra egg to maintain moisture. The cake will still be delicious but may have a different mouthfeel.
How do I prevent the cake from cracking on top?
Cracking is normal with rich chocolate cakes, but you can minimize it by ensuring your oven is fully preheated to 350°F and the batter is at room temperature. Avoid opening the oven door during the first 20 minutes of baking. If cracks appear, they're actually a sign of a perfectly baked cake—just dust with extra powdered sugar to hide them!
Is this cake truly gluten-free?
Yes, this recipe uses certified gluten-free ingredients only. The 0.25 cup gluten-free all-purpose flour is the only flour used, and it's a small enough amount that it doesn't compromise the "almost flourless" texture. Just be sure to check that your almond flour is also certified gluten-free if you're avoiding all traces of gluten.
Can I bake this in a different pan size?
For best results, use two 8-inch round pans as specified. If you must use a different size, adjust the baking time accordingly—smaller pans (6-inch) may need 25-30 minutes, while larger pans (9-inch) could require 40-45 minutes. Always check with a toothpick to ensure doneness. The cake should be set but still slightly fudgy in the center.