
Desserts
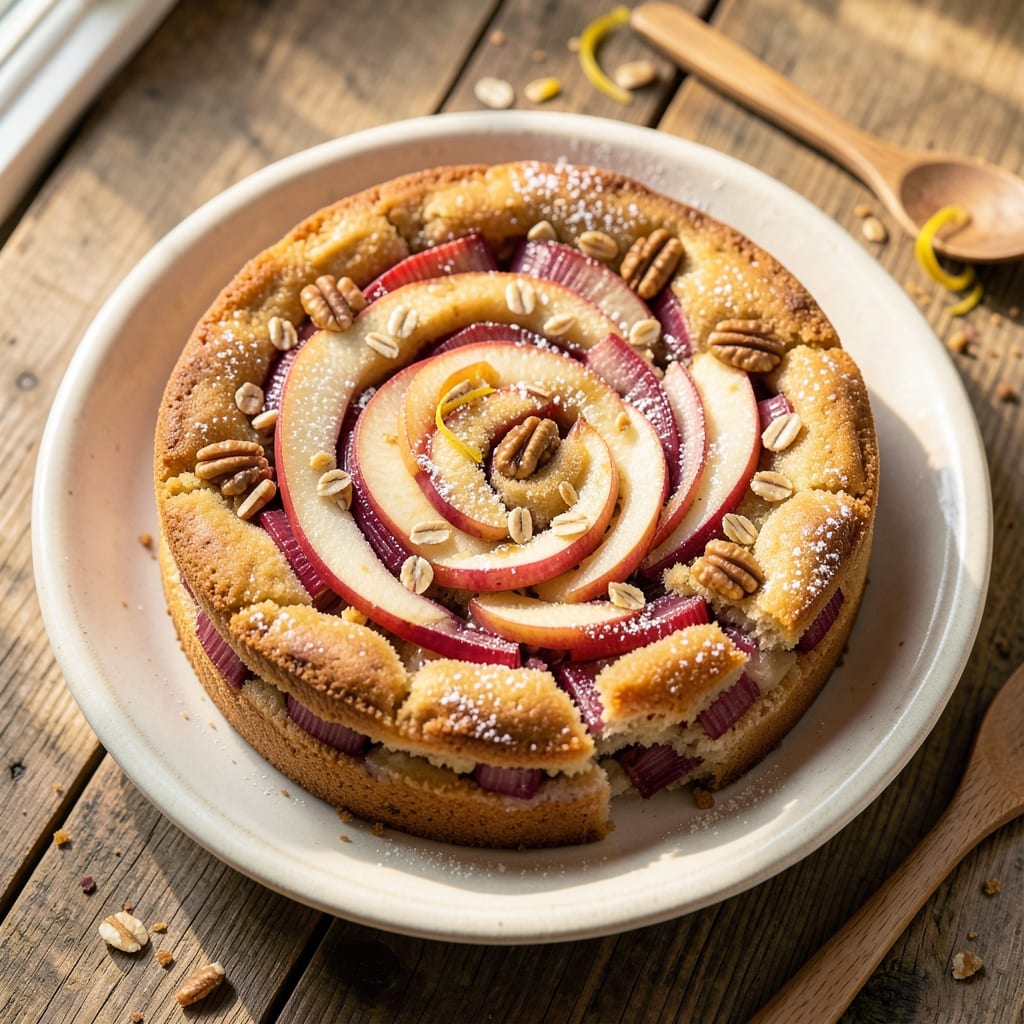
This apple and rhubarb cake recipe delivers the perfect balance of tart rhubarb and sweet apples in every tender bite. The golden crust encases moist layers infused with warm cinnamon and nutmeg, creating a dessert that feels like autumn in every forkful. I developed this recipe after years of baking experiments, focusing on achieving that ideal texture—soft yet sturdy enough to hold up to the tart filling without falling apart.
The secret to this cake lies in the rhubarb-apple filling, which needs just the right amount of sugar to caramelize naturally while preserving its bright tang. I use a two-layer approach: a spiced cake base and a streusel-like crumb topping that adds texture and depth. Baking at 350°F for 45-50 minutes ensures a perfectly set crust while keeping the inside tender and moist.
What makes this cake truly special is how the flavors evolve with each slice. The rhubarb’s sharpness cuts through the sweetness of the apples, while the cinnamon-spiced cake adds warmth. The result is a dessert that’s rich yet balanced, elegant enough for company but simple enough for a weeknight treat. Serve warm with vanilla ice cream or whipped cream to enhance the layers of flavor.
For those who love customization, you can adjust the sugar in the filling to suit your taste or add a lemon glaze for extra brightness. The recipe also scales beautifully for gatherings—just double the ingredients and bake in a larger pan. Let’s get baking!
Ingredients for apple and rhubarb cake
These simple, quality ingredients create the perfect autumn dessert with tart rhubarb and sweet apples.
| Ingredient | Amount | Notes |
|---|---|---|
| All-Purpose Flour 🌾 | 2 ½ cups | Sifted for light texture |
| Granulated Sugar 🍚 | 1 ½ cups | White or light brown |
| Light Brown Sugar 🍚 | ½ cup | Packed firmly |
| Rhubarb 🍎 | 1 ½ cups | Chopped into small pieces |
| Apples 🍎 | 2 medium | Peeled, cored, diced small |
| Granulated Sugar (for filling) 🍚 | ¾ cup | Adjust to taste |
| Unsalted Butter 🧈 | 1 cup | Cold, cubed |
| Large Eggs 🥚 | 2 whole | Room temperature |
| Vanilla Extract 🌸 | 1 tsp | Pure vanilla |
| Ground Cinnamon 🌿 | 2 tsp | Freshly ground preferred |
| Ground Nutmeg 🌿 | ½ tsp | Freshly grated |
| Baking Powder 🧂 | 2 tsp | Aluminum-free |
| Salt 🧂 | ½ tsp | Fine sea salt |
| Old-Fashioned Rolled Oats 🌾 | ½ cup | For crumb topping |
| Chopped Walnuts 🥜 | ¼ cup | Toasted for flavor |
The rhubarb and apples are the stars here—pick ripe but firm apples like Honeycrisp or Granny Smith, and use bright red rhubarb for that signature tang. I grab mine at Whole Foods when they're in season, but any grocery store's produce section works. For the filling, don't skip peeling the rhubarb—it's too fibrous and can make the cake gummy. The walnuts? Trader Joe's has the best pre-chopped kind, but toast your own if you've got time. Just spread them on a baking sheet and toast at 350°F for 5-7 minutes until fragrant.
No rhubarb? Substitute extra apples or tart cherries—just reduce the sugar in the filling by 2 tbsp. Running low on walnuts? Pecans or almonds work too, though the flavor will shift slightly. The crumb topping is non-negotiable though—it's what gives this cake that perfect texture contrast. If you're in a rush, quick oats work in a pinch, but old-fashioned rolled oats give the best texture. The butter needs to be cold for the crust—take it out of the fridge 30 minutes before mixing so it's soft but not melted.
This cake keeps beautifully for 4-5 days in an airtight container at room temperature, though it's best enjoyed fresh. For longer storage, wrap tightly and refrigerate for up to 1 week. I always bake an extra pan—freezes perfectly for 3 months and makes a great make-ahead dessert. The filling can be prepped ahead too—just store it in the fridge until ready to assemble. And trust me, the first slice out of the oven is worth the wait.
Why You'll Love This Recipe
- No-Fuss Mix-In: I swear by this recipe because you just dump chopped rhubarb and apples right into the batter—no fancy layering or precise slicing. The flour and sugars handle the rest, turning those tart chunks into something tender and golden without a single extra step.
- Tart-Sweet Magic: That combo of brown sugar’s caramel depth and rhubarb’s tang? It’s like autumn and spring had a baby. The apples keep it from being too sour, so every bite feels balanced—like a hug from a bakery you can’t pronounce.
- Breakfast or Dessert: Honestly, I’ve served this with yogurt for brunch and as a snack with tea. The texture holds up either way—moist enough to eat plain, sturdy enough to slice for guests. (Yes, even on a Tuesday night when you’re craving cake but also need protein.)
- Leftovers That Shine: This cake actually improves the next day. The sugars caramelize more, the rhubarb softens into jammy pockets, and it’s still fresh-tasting. I’ve packed it for lunches, reheated slices for toast, and even turned it into trifle—no waste, all flavor.
Step-by-step instructions for apple and rhubarb cake
This cake delivers a perfect balance of tart rhubarb and sweet apples with a golden crust.
Prepare the Crumb Topping
In a medium bowl, combine the 0.5 cup old-fashioned rolled oats, 0.25 cup chopped walnuts, 0.5 cup light brown sugar, 2 tsp ground cinnamon, and 0.5 tsp ground nutmeg. Mix well with your fingers until the walnuts are evenly distributed. This crumb topping will add delightful texture contrast to the cake's moist layers.
Spread the mixture evenly over the bottom of a 9-inch round cake pan that's been lightly greased and lined with parchment paper. Press down gently with your fingertips to create a compact base. This step ensures the crumb stays in place during baking and creates that perfect crunchy bottom layer.
Mix the Cake Batter
In a large mixing bowl, cream together the 1 cup unsalted butter and 1.5 cups granulated sugar on medium speed until light and fluffy, about 3-4 minutes. This step is crucial for creating a tender cake texture. Scrape down the sides of the bowl as needed to ensure even mixing.
Add the 2 whole large eggs, one at a time, mixing well after each addition. Then stir in the 1 tsp vanilla extract. In a separate bowl, whisk together the 2.5 cups all-purpose flour, 2 tsp baking powder, and 0.5 tsp salt. Gradually add the dry ingredients to the wet mixture, mixing just until combined. Be careful not to overmix—the batter should be smooth but still slightly lumpy.
Create the Fruit Filling
In a medium bowl, combine the 1.5 cups chopped rhubarb, 2 medium diced apples, and 0.75 cup granulated sugar. Toss gently to coat the fruit evenly with sugar. Let this mixture sit for 10 minutes while you prepare the cake layers. This allows the fruit to release some juices and soften slightly, creating a more flavorful filling.
After the waiting period, drain any excess liquid from the fruit mixture using a fine-mesh strainer. This prevents a soggy cake texture while preserving the wonderful tartness of the rhubarb and sweetness of the apples. The filling should be moist but not watery.
Assemble and Bake the Cake
Preheat your oven to 350°F. Spread half of the cake batter evenly over the crumb topping in the prepared pan. Using a spatula, create a slight well in the center. Pour half of the prepared fruit filling into this well, then gently swirl it into the batter to create a marbled effect.
Add the remaining batter over the fruit mixture, then top with the rest of the fruit filling. Gently swirl again to create a beautiful pattern. Bake for 45-50 minutes or until a toothpick inserted into the center comes out clean. The cake should be golden brown with a slightly domed top.
Cool and Serve
Allow the cake to cool in the pan for 15 minutes, then transfer it to a wire rack to cool completely. This gradual cooling prevents the cake from cracking as it sets. Once completely cooled, you can slice and serve. The cake should have a tender crumb with pockets of juicy fruit throughout, balanced by the crunchy oat topping.
For the best experience, serve at room temperature. The flavors develop and meld beautifully as the cake sits. Store any leftovers covered at room temperature for up to 3 days or refrigerated for up to 5 days. Enjoy this perfect balance of tart and sweet in every bite!
Pro Tips For Making Apple And Rhubarb Cake
- CHOP RHUBARB SMALL: I learned this the hard way—big chunks of rhubarb turn into a mushy, watery mess in the cake. Cut it into ¼-inch pieces so it cooks through evenly and holds its shape. (Yes, it takes a few extra minutes, but the texture makes all the difference.)
- BAKE UNTIL 210°F: Your cake might look "done" at 190°F, but pull it when the internal temp hits 210°F—this guarantees a tender crumb, not a gummy one. I used to rely on toothpick tests, but this method never fails, even with the extra moisture from rhubarb and apples.
- DON’T SKIP THE BROWN SUGAR: Light brown sugar adds depth the white sugar can’t. Use it as written—it’s not just for color. I was skeptical until I tried it: the cake had a richer, almost caramel-like flavor that balanced the tartness of the rhubarb.
- TOSS FRUIT IN FLOUR: Toss the chopped rhubarb and apples in 1–2 tablespoons of flour before folding them into the batter. This keeps the fruit from sinking and makes the cake more uniform. (I know it sounds like extra work, but it’s worth it—no surprise pockets of raw fruit.)
Common mistakes when making perfect results
Overmixing the Batter
I’ve ruined more cakes than I’ll admit by overmixing the batter, and this one’s no exception. Once you’ve combined the dry ingredients with the wet, stop mixing as soon as they’re just incorporated—about 10-15 strokes. Overmixing develops gluten, which makes the cake dense and tough instead of tender. The batter should look slightly lumpy, like pancake batter. 💡
Skipping the Crumb Topping
The crumb topping isn’t just decoration—it’s what gives this cake its signature texture contrast. If you skip it, you’ll lose that delightful crunch against the moist cake layers. Press it firmly into the pan so it stays put during baking. Pro tip: Toast the walnuts first—they’ll add extra flavor and prevent them from turning mushy.
Underestimating the Fruit Juices
Rhubarb and apples release a surprising amount of liquid, and if you don’t drain the excess, your cake will turn out soggy. After letting the fruit mixture sit for 10 minutes, strain it through a fine-mesh strainer to remove any excess juice. This step is non-negotiable for that perfect tender crumb. Trust me, your cake will thank you.
Baking Without Parchment
Greasing the pan is good, but lining it with parchment paper is even better. Without it, the cake might stick, especially along the edges, and you’ll end up with a less-than-perfect slice. If you’re worried about the paper touching the batter, just crumple it slightly before placing it in the pan—it’ll conform to the shape and prevent sticking. 🍎
Ignoring the Resting Time
Fresh out of the oven, this cake looks irresistible, but slicing it too soon is a mistake. Let it cool in the pan for 15 minutes first, then transfer it to a wire rack to cool completely. Rushing this step can cause the cake to crumble or crack as it sets. Patience here ensures clean slices and a perfect texture.
Using the Wrong Sugar Ratio
The filling’s sugar balance is everything—too little and the tartness overpowers, too much and it’s cloyingly sweet. Stick to the ¾ cup granulated sugar for the filling, but adjust to taste if your rhubarb is particularly tart. A good rule of thumb: If the filling tastes too sharp, add 1 tbsp more sugar and let it sit for another 5 minutes to mellow out the flavors.
Nutrition facts
Frequently asked questions
Can I substitute rhubarb in this cake?
Yes! If you don't have rhubarb, try tart cherries or extra apples (reduce sugar by 2 tbsp). For a tropical twist, mango or pineapple work well too—just adjust sugar to balance the sweetness. The key is maintaining that tart contrast to complement the cake's richness.
How do I store leftovers to keep them fresh?
Store at room temperature in an airtight container for up to 3 days. For longer storage, refrigerate for 1 week or freeze for 3 months. Wrap tightly with plastic wrap and foil to prevent drying. The crumb topping stays crispy when properly stored!
Can I make this cake in a different pan size?
For a 9x13-inch pan, reduce baking time to 35-40 minutes and cover loosely with foil after 25 minutes to prevent over-browning. For a 6-inch round pan, increase baking time by 10 minutes. Always use the same oven temperature (350°F).
What's the best way to serve this cake?
Serve warm with vanilla ice cream or whipped cream to enhance the fruit flavors. For extra flair, add a lemon glaze (mix ½ cup powdered sugar + 1 tbsp lemon juice) or dust with powdered sugar. The contrast of cold ice cream with warm cake is pure magic!
Why did my cake turn out dense?
Overmixing the batter or skipping the 10-minute fruit resting time can cause density. Also check: Did you drain excess fruit juices? If not, the moisture can make the cake gummy. For next time, mix just until combined (10-15 strokes) and strain the fruit thoroughly.