
Desserts
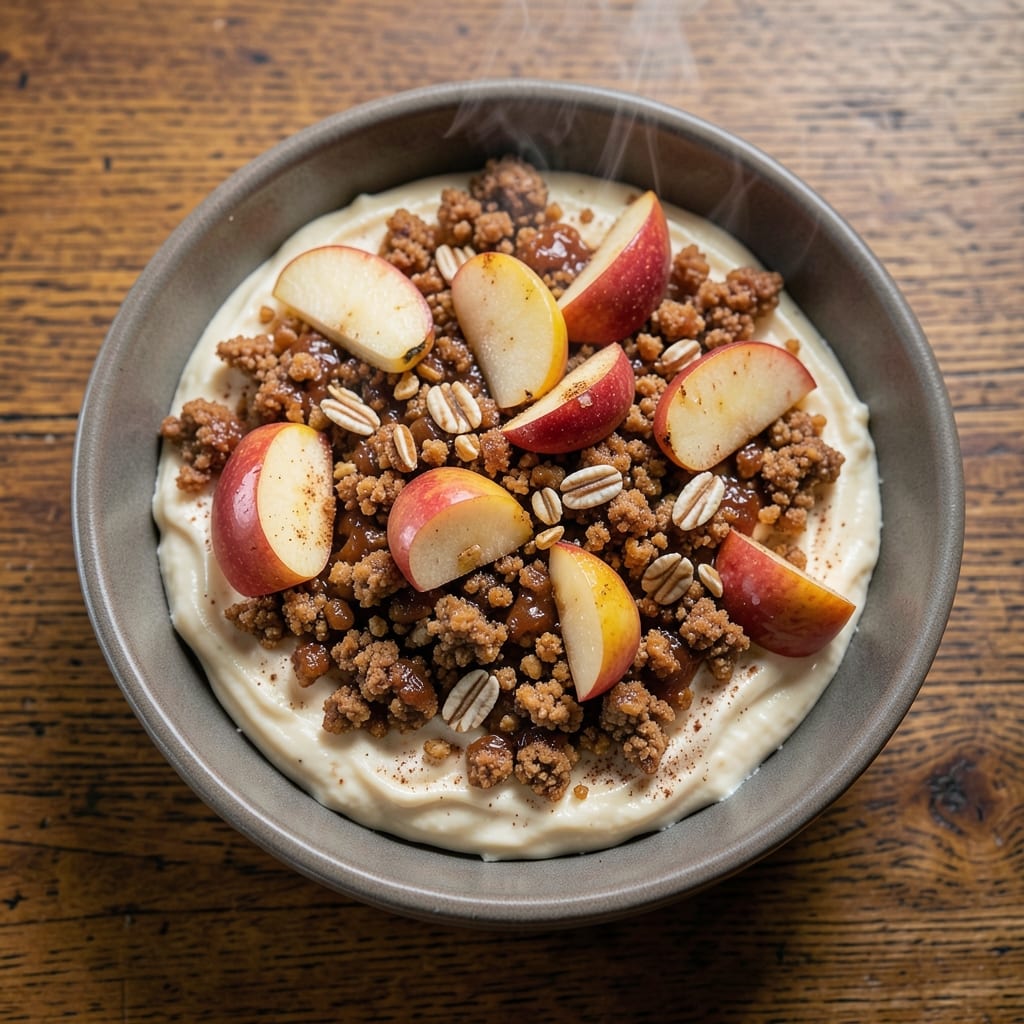
This apple pie crumble cheesecake recipe transforms two beloved desserts into one showstopping masterpiece—where warm spiced apples meet a buttery crumble and velvety cheesecake swirl. The secret lies in baking the pie crust first, then the apple filling, followed by the cheesecake layer, ensuring each component stays perfectly textured without sogginess. I perfected this recipe after years of testing, balancing crispy, creamy, and tender elements into one decadent bite.
The magic happens in the layers: a flaky pie crust filled with spiced apples that caramelize to golden perfection, topped with a buttery crumble that stays crisp, and finished with a rich cheesecake swirl that adds creamy contrast. This isn’t just dessert—it’s a restaurant-quality experience you can recreate at home with simple techniques and patience. The cheesecake layer is baked separately and swirled in before the final crumble topping, creating a visual and textural masterpiece.
What makes this recipe truly special is how the flavors and textures play together—warm cinnamon apples cut through the richness of the cheesecake, while the crumble adds a satisfying crunch. It’s the kind of dessert that disappears quickly, leaving guests asking for seconds. The best part? It’s built in stages, so you can prep ahead and assemble just before baking, making it perfect for special occasions or when you want to impress.
Ready to bake a dessert that feels like a hug? This recipe delivers triple-layered magic—crispy, creamy, and spiced—without the fuss of complicated techniques. Let’s get started on creating something extraordinary.
Ingredients for apple pie crumble cheesecake
Eighteen ingredients crafting three decadent layers—crisp crust, spiced apples, and velvety cheesecake swirl.
| Ingredient | Amount | Notes |
|---|---|---|
| All-Purpose Flour 🌾 | 2 ½ cups | For pie crust and crumble |
| Unsalted Butter 🧈 | 1 ½ cups | Cold, cubed for crust |
| Granulated Sugar 🍚 | 1 ½ cups | Plus 0.25 cup for crumble |
| Light Brown Sugar 🍚 | ½ cup | Packed, for crumble |
| Old-Fashioned Rolled Oats 🌾 | 1 cup | For crumble texture |
| Ground Cinnamon 🌿 | 2 tbsp | Plus extra for apples |
| Ground Nutmeg 🌶️ | ½ tsp | Freshly grated preferred |
| Salt 🧂 | 1 ½ tsp | Fine sea salt preferred |
| Red Delicious Apples 🍎 | 4 medium | Peeled, sliced 1/4-inch thick |
| Lemon Juice 🍋 | 1 ½ tbsp | Freshly squeezed |
| Heavy Cream 🥛 | 1 ½ cups | Full-fat for richness |
| Cream Cheese 🧀 | 16 oz | Room temperature, full-fat |
| Large Eggs 🥚 | 2 whole | Room temperature |
| Vanilla Extract 🌿 | 1 tsp | Pure vanilla preferred |
| All-Purpose Flour 🌾 | ¼ cup | For cheesecake layer |
The apples are non-negotiable—Red Delicious or Honeycrisp hold their shape beautifully while caramelizing. Local farmers markets often have the best selection, or grab them pre-washed at Whole Foods for convenience. Peeling is optional, but it ensures a cleaner texture. For the pie crust, cold butter is critical—cut it into 1/2-inch cubes and chill the dough between folds. The crumble oats should be old-fashioned, not quick—Bob's Red Mill is my go-to brand for consistent texture. Preheat your oven to 375°F before starting, as each layer requires precise timing.
No Red Delicious apples? Granny Smith or Braeburn work equally well—they just caramelize slightly faster. Running short on oats? Crushed graham crackers or panko at half the quantity mimic the crunch. The cheesecake layer can handle substitutions too: mascarpone replaces half the cream cheese for a lighter texture. For the crust, if you lack butter, vegetable shortening works in a pinch, though purists will notice the difference. The vanilla extract should be pure—imitation extracts lack the depth needed to complement the spiced apples. When mixing the cheesecake batter, avoid overmixing to prevent a dense texture.
Prep the pie crust first—it needs 20 minutes to chill before rolling. The apple filling can be made a day ahead and refrigerated, covered tightly. The cheesecake batter should rest for 15 minutes before baking to prevent cracking. Once assembled, bake the cheesecake layer separately for 30 minutes at 325°F, then swirl it into the pie before adding the crumble topping. Store leftovers in an airtight container for up to 4 days—though it rarely lasts that long. For make-ahead convenience, freeze individual slices wrapped in parchment for up to 2 months, thawing at room temperature before serving.
Why You'll Love This Recipe
- No Fuss Assembly: I swear by this recipe because it’s basically a grown-up dessert for people who still love crumble bars. You just mix the dry ingredients—flour, oats, sugars—then fold in cold butter until it’s crumbly. No rolling, no fussing, and no waiting for dough to rest.
- Caramelized Apple Magic: That warm spiced-apple filling (even if you skip the pie spice) melts into the creamy cheesecake layer like a hug. The brown sugar in the crumble topping caramelizes just enough to turn every bite into a little flavor bomb—sweet, buttery, and nostalgic all at once.
- Weeknight Crowd Pleaser: Between us, this is my go-to for book club gatherings or lazy Sundays. It’s sturdy enough to slice and serve without falling apart, and the oat crumble keeps it interesting. Plus, it’s way more impressive than store-bought cheesecake but takes half the time.
- Leftovers That Last: Honestly, I make a double batch because it’s that good. The crumble stays crisp, the filling stays rich, and it keeps for days in the fridge. Perfect for when you want dessert but don’t want to bake again—just reheat slices or serve cold. My kids even ask for it over ice cream.
Step-by-step instructions for apple pie crumble cheesecake
This dessert combines three iconic textures in perfect harmony—crisp crust, spiced apple filling, and velvety cheesecake. Precision matters at every layer.
Prepare the Pie Crust Foundation
In a large mixing bowl, combine the 2.5 cups all-purpose flour with 1.5 tsp salt. Cut in the 1.5 cups cold, cubed unsalted butter using a pastry cutter or your fingers until the mixture resembles coarse crumbs with pea-sized butter pieces. This texture is crucial—it ensures flaky layers rather than dense dough.
Gradually add 6 tablespoons ice water, 1 tablespoon at a time, mixing gently with a fork just until the dough comes together. Avoid overmixing. Shape the dough into a disc, wrap in plastic, and refrigerate for at least 1 hour. Chilling firms up the butter, preventing shrinking during baking. Preheat your oven to 375°F while the dough rests.
Assemble the Cheesecake Layer
In a separate bowl, beat the 16 oz room-temperature cream cheese and 1.5 cups heavy cream together until smooth and fully combined. This step prevents lumps that would make your cheesecake grainy. In a medium bowl, whisk together the 2 whole large eggs, 1 tsp vanilla extract, and 0.25 cup all-purpose flour. Slowly pour the egg mixture into the cream cheese mixture while whisking constantly.
Pour the cheesecake batter into your prepared pie crust (pressed into a 9-inch pie dish). Smooth the top with a spatula. Bake for 35-40 minutes until the edges are set and the center still jiggles slightly when shaken. The cheesecake will continue thickening as it cools. Remove from the oven and let cool completely on a wire rack before adding the next layer.
Prepare the Spiced Apple Filling
Peel, core, and slice the 4 medium Red Delicious apples into ¼-inch thick slices. Toss them immediately with 1.5 tbsp lemon juice to prevent browning. In a small bowl, mix together 2 tbsp ground cinnamon, 0.5 tsp ground nutmeg, and 0.25 cup granulated sugar (reserved from the ingredients). Sprinkle this spice mixture evenly over the apple slices and toss gently to coat.
Spread the spiced apples evenly over the cooled cheesecake layer. The filling should cover the entire surface but remain in a single layer—no overlapping slices. This ensures even baking and proper texture contrast. Return the pie to the oven and bake for 20-25 minutes until the apples soften but still hold their shape. The filling should release its juices but not become mushy.
Create the Crumble Topping
While the apple layer bakes, prepare the crumble topping by combining 1 cup old-fashioned rolled oats, 0.5 cup light brown sugar, 0.5 cup granulated sugar, 2 tbsp ground cinnamon, and 0.5 tsp ground nutmeg in a medium bowl. Cut in the remaining 0.5 cup cold, cubed unsalted butter using a pastry cutter or your fingers until the mixture resembles coarse crumbs with some larger pieces remaining.
Sprinkle the crumble mixture evenly over the baked apple layer. The topping should cover the apples completely but remain in distinct clusters rather than a smooth layer. This creates those signature crunchy pockets. Return the pie to the oven and bake for an additional 15-20 minutes until the crumble is deep golden brown and the filling bubbles slightly at the edges.
Cool and Serve for Perfect Texture
Remove the pie from the oven and let it cool completely on a wire rack for at least 2 hours. This cooling period is critical—it allows all layers to set properly. The cheesecake will firm up, the apples will release their juices into the crumble, and the crumble will crisp up further as it cools.
Slice the pie into 8 equal wedges using a sharp, hot knife (dip the knife in hot water between cuts). Serve at room temperature for the best texture contrast—crisp crumble, tender apples, and creamy cheesecake in every bite. Store any leftovers covered at room temperature for up to 3 days or refrigerated for up to 5 days, though the crumble will lose some of its crispness over time.
Pro Tips For Making Apple Pie Crumble Cheesecake
- Toast the Oats First: I learned this the hard way—skipping the toasting step means your crumble topping will taste flat and mealy. Spread the rolled oats on a baking sheet and toast at 350°F (175°C) for 5-7 minutes until they’re golden and smell nutty. This adds depth and prevents that sad, dry texture in the final crumble.
- Cut Cold Butter in Cubes: Resist the urge to use softened butter for the crumble mixture. Instead, chill your butter for 20 minutes first, then cut it into ½-inch cubes. This keeps the texture light and flaky—no greasy mess when baking.
- Mix Dry Ingredients First: Dump the flour, brown sugar, and granulated sugar into your bowl before adding the butter. Use a pastry cutter or your fingers to work the butter into the dry mix until it resembles coarse crumbs. This avoids overworking the dough and ensures even distribution of sweetness.
- Press Crumble Firmly: Don’t just sprinkle the crumble topping—press it down gently but firmly over the cheesecake filling. This locks in moisture and prevents gaps where the filling might ooze out during baking. A light sprinkle of oats on top keeps it from sticking to your hands.
Storing and reheating your leftovers
Room Temperature Storage
This dessert shines best at room temperature, where the crumble stays crisp and the cheesecake maintains its velvety texture. Store leftovers in an airtight container (I love Cambro food containers) for up to 3 days—just bring it out 1 hour before serving to let the layers fully set. The crumble will soften slightly in the fridge, so avoid refrigerating longer than necessary. 🍂
Freezing for Later
For longer storage, freeze individual slices wrapped in parchment paper and placed in a ziplock bag for up to 2 months. Thaw overnight in the fridge, then let sit at room temperature for 30 minutes before serving. The texture won’t be perfect after freezing—expect slightly softer crumble—but it’s still delicious. I recommend freezing only the slices you’re unsure about eating within 3 days. ❄️
Reviving Crispiness
If your crumble loses its crunch after refrigeration, the secret is a quick broil. Place slices on a baking sheet and broil for 2-3 minutes at 350°F until golden again. For extra crunch, sprinkle with powdered sugar or toasted oats before serving. This works wonders for restoring that fresh-baked appeal. 🔥
Microwave Reheating
For a quick fix, microwave individual slices on medium power (50%) for 20-30 seconds—just until warm. Cover with a damp paper towel to prevent drying. The cheesecake layer reheats best this way, though the crumble may soften further. I only recommend this for one serving—no leftovers should be microwaved more than once. 💫
Serving Suggestions
Pair with vanilla ice cream or caramel sauce for extra indulgence. For a lighter touch, serve with whipped cream and a sprinkle of cinnamon. The contrast of warm dessert with cool toppings elevates every bite. Store any remaining toppings in the fridge separately to keep them fresh. 🍦
Layer Preservation
To maintain perfect separation between layers, avoid stacking slices directly on top of each other in storage. Instead, use parchment paper between layers in your container. This prevents the cheesecake from absorbing moisture and keeps the crumble crisp. Trust me, your guests will notice the difference! 💡
Nutrition facts
Frequently asked questions
Can I make this dessert ahead of time?
The pie crust can be prepped 1 day ahead and stored in the fridge. The apple filling can also be made 24 hours in advance and refrigerated. However, assemble the cheesecake layer and bake it the day you plan to serve—it's best enjoyed fresh when the crumble is at its crispiest. The crumble topping should always go on fresh after baking to maintain its perfect texture.
How do I prevent the cheesecake layer from cracking?
Cracking happens when the cheesecake bakes too quickly. Start by making sure all ingredients are room temperature, especially the cream cheese and eggs. Bake at 325°F (not higher) and avoid opening the oven door during baking. Let the cheesecake cool gradually in the oven after baking by turning off the heat and leaving it inside for 15 minutes before transferring to a rack. This slow cooling helps prevent cracks.
Can I use a different type of apple?
Yes, but choose apples with good structure that hold their shape when baked. Granny Smith or Honeycrisp work beautifully—they caramelize nicely and stay firm. Avoid overly soft varieties like McIntosh, which can turn mushy. If using tart apples, you may want to reduce the sugar in the spice mixture slightly to balance flavors.
Why is my crumble topping not crispy? An undercooked crumble is usually the culprit.
Can I make this gluten-free?
Yes, but you'll need to make some adjustments. Use a gluten-free pie crust (store-bought or homemade with gluten-free flour blend). For the crumble, replace the oats with gluten-free rolled oats or crushed gluten-free graham crackers. The cheesecake layer can remain the same, but check that your vanilla extract and spices are certified gluten-free. Keep in mind the texture may vary slightly from the original recipe.