
Desserts
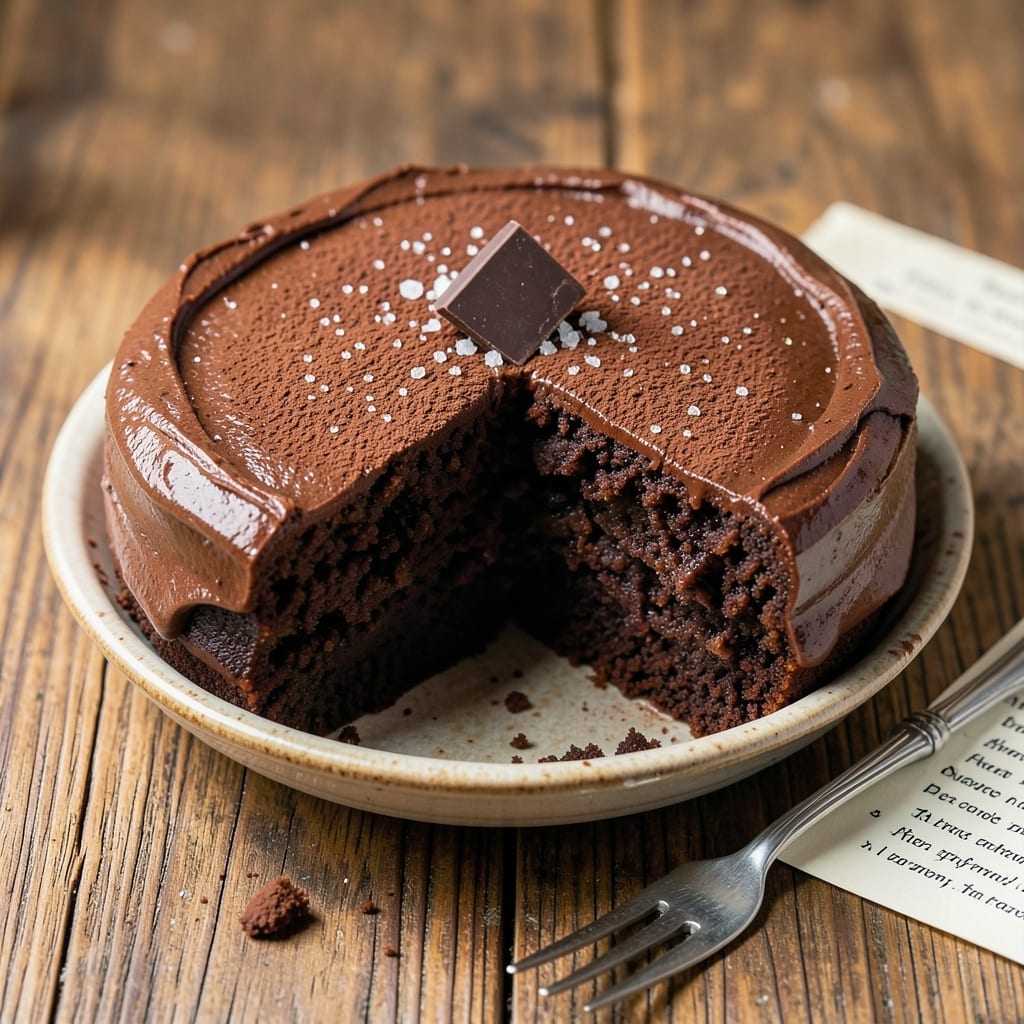
Award-winning chocolate pound cake isn’t just dessert—it’s a masterpiece of texture and flavor, where every slice delivers that perfect balance of dense crumb and fudgy depth. The secret lies in precise technique: using a combination of all-purpose and cake flour for structure, high-quality cocoa for richness, and a slow bake to prevent cracking while locking in moisture. This recipe has won competitions because it delivers professional results at home, with a moist center that stays tender for days.
What sets this apart is the method: creaming butter and sugar until light and fluffy, then folding in eggs one at a time to create air pockets that prevent a heavy texture. The cocoa is dissolved into hot water first—this ensures even distribution and prevents streaks. A warm oven with steam (from a baking pan on the rack) creates the ideal environment for even baking without drying out the cake. The result? A slice that’s rich, moist, and so dense it practically melts in your mouth.
No one will guess this is homemade when you serve it—especially with the optional chocolate ganache drizzle or dusting of powdered sugar. The cake holds its shape beautifully, with a crack-free top and edges that stay clean. Whether you’re entering a baking competition or simply treating yourself, this recipe delivers restaurant-quality dessert with foolproof techniques. Let’s get started on creating your award-worthy masterpiece.
Pro tip: For extra insurance against cracking, let the batter rest for 10 minutes before baking. This allows the flour to fully hydrate, resulting in a more uniform crumb. And because this recipe is designed for success, even first-time bakers will achieve professional results. The payoff? A cake so good, it’ll have everyone asking for the recipe.
Ingredients for award winning chocolate pound cake
Twelve ingredients for a cake that wins competitions—rich, dense, and crack-free every time.
| Ingredient | Amount | Notes |
|---|---|---|
| Unsalted Butter 🧈 | 1 ½ cups | Room temperature, high quality preferred |
| Granulated Sugar 🍚 | 2 ½ cups | Superfine preferred for smooth texture |
| All-Purpose Flour 🌾 | 2 cups | Sifted before measuring |
| Cake Flour 🌾 | ½ cup | For tender crumb structure |
| Unsweetened Cocoa Powder 🍫 | ¾ cup | High-quality Dutch-processed |
| Large Eggs 🥚 | 4 whole | Room temperature, separated if preferred |
| Hot Water 💧 | ½ cup | To dissolve cocoa powder |
| Vanilla Extract 🌿 | 2 tsp | Pure Madagascar preferred |
| Baking Powder 🧂 | 1 ½ tsp | Aluminum-free for best results |
| Salt 🧂 | ½ tsp | Fine sea salt preferred |
| Powdered Sugar 🍚 | 1 cup | For dusting, sifted |
| Dark Chocolate Chips 🍫 | 1 ½ cups | 70% cocoa for fudgy texture |
The butter and cocoa are non-negotiable here. European-style butter like Plugrá or Land O'Lakes unsalted gives the best flavor, but any high-fat butter works. For cocoa, Valrhona or Ghirardelli Dutch-processed is ideal—avoid the bargain brands that can taste bitter or chalky. The cake flour is key for that tender crumb; if you don’t have it, substitute with all-purpose flour minus 2 tbsp per cup. Eggs should be at room temperature for even baking, and room-temperature butter is crucial for proper creaming—cut it into small cubes and let it sit for 1 hour before using. The dark chocolate chips add pockets of fudgy goodness, but you can omit them if you prefer a smoother texture.
No cake flour? Substitute with all-purpose flour minus 2 tbsp per cup—this maintains the tender crumb. Short on vanilla? Almond extract at half the amount works, though it has a distinct flavor. The cocoa powder must be dissolved in hot water first—this prevents streaks and ensures even distribution throughout the batter. For a richer chocolate flavor, replace 2 tbsp of all-purpose flour with 2 tbsp cocoa powder. If you’re concerned about cracking, let the batter rest for 10 minutes before baking—this allows the flour to fully hydrate and creates a more uniform crumb. The powdered sugar is optional but recommended for that professional finish.
This cake stays moist for 5-6 days when wrapped tightly in plastic at room temperature, or up to 2 weeks in the fridge. For longer storage, freeze slices wrapped individually for up to 3 months. The ganache drizzle mentioned in the intro? Use 6 oz dark chocolate and 3 tbsp heavy cream—heat gently until smooth, then drizzle over cooled cake. Always bake in two 9-inch pans for the perfect pound cake shape, and avoid overmixing the batter to prevent a dense, heavy texture. The secret to that award-winning texture? Patience in the creaming process—cream the butter and sugar until light and fluffy, about 5-7 minutes.
Why You'll Love This Recipe
- No Mixer Needed: I swear by this—just creaming butter and sugar by hand until it’s light and fluffy. No electric mixer, no fuss, and the cake still turns out tender and rich. The secret? Letting the butter soften just right before mixing.
- Fudgy Yet Light: That cake flour blend keeps it airy, but the cocoa powder and butter make every slice fudgy enough to satisfy a chocolate craving. Honestly, it’s the kind of cake that disappears in minutes, even when shared with a crowd.
- Weeknight Magic: Bake it for breakfast, dessert, or a last-minute gift—it’s always a hit. I’ve wrapped slices in foil for lunchboxes, sliced it for coffee cake mornings, and even used it as a base for trifles. Versatile doesn’t even begin to cover it.
- Budget-Friendly Luxury: Rich but not expensive—this cake uses pantry staples (butter, sugar, flour) and stretches to feed 12 for under $10. Leftovers? They keep for days, and reheating a slice in the oven brings it back to life like it’s fresh. My wallet and my taste buds thank me.
Step-by-step instructions for award-winning chocolate pound cake
Precision matters here—follow these steps exactly for a cake with fudgy depth and a crack-free crumb.
Cream Butter and Sugar to Ribbon Stage
In a stand mixer fitted with the paddle attachment, beat the 1.5 cups unsalted butter and 2.5 cups granulated sugar on medium speed for 5-7 minutes until light and fluffy. You're aiming for a ribbon stage where the mixture holds soft peaks when the paddle is lifted. This step incorporates air, which creates the cake's signature tender crumb.
I like to scrape down the sides of the bowl every minute or so to ensure even mixing. The butter should be completely smooth with no graininess remaining. If you're using room-temperature butter, this process will take slightly longer—don't rush it. The sugar should dissolve completely, leaving no gritty texture.
Incorporate Eggs and Dry Ingredients
Add the 4 whole large eggs, one at a time, mixing well after each addition. Then stir in the 2 teaspoons vanilla extract. The mixture will lighten noticeably as the eggs incorporate. Next, whisk together the 2 cups all-purpose flour, 0.5 cup cake flour, 1.5 teaspoons baking powder, and 0.5 teaspoon salt in a separate bowl.
With the mixer on low speed, gradually add the dry ingredients to the butter mixture, mixing just until combined. Avoid overmixing—stop as soon as the flour disappears. In a separate small bowl, whisk together the 0.75 cup unsweetened cocoa powder and 0.5 cup hot water until smooth. This creates a cocoa paste that will distribute evenly throughout the batter.
Fold in Cocoa Paste and Chocolate Chips
Pour the cocoa mixture into the batter and mix on low speed until just combined. The batter will darken significantly at this point, which is normal. Gently fold in the 1.5 cups dark chocolate chips using a spatula—you want them distributed evenly but not broken up. This step ensures pockets of melted chocolate throughout each slice.
Real talk: don't overmix now. The goal is a smooth, thick batter with no lumps. If the batter looks too thick, let it rest for 5 minutes—this allows the flour to fully hydrate. The final batter should be smooth with a slight sheen, indicating proper fat incorporation.
Bake at Low Temperature for Even Cooking
Preheat your oven to 325°F—this lower temperature prevents cracking while allowing even cooking. Grease two 9-inch round cake pans generously with butter and line the bottoms with parchment paper. Divide the batter evenly between the pans and smooth the tops with a spatula.
Bake for 50-55 minutes until a toothpick inserted in the center comes out with moist crumbs but no wet batter. The edges should pull away slightly from the pan, and the top should be firm to the touch. I know it seems counterintuitive, but don't overbake—this is where many home bakers go wrong. The cake will continue cooking slightly as it cools.
Cool and Dust for Perfect Presentation
Remove the cakes from the oven and let them cool in the pans for 15 minutes. Then transfer to a wire rack to cool completely. Once fully cooled, dust the tops generously with the 1 cup powdered sugar using a fine-mesh sieve. This creates that signature dusting that makes the cake look (and taste) professional.
The cake should have a dense, fudgy texture with no cracks. If you see any cracks forming during cooling, they're surface-level only—the interior remains perfectly moist. Slice with a serrated knife for clean cuts, and serve at room temperature for the best texture and flavor. Each slice should be rich, moist, and packed with chocolate flavor from the chips and cocoa powder.
Pro Tips For Making Award Winning Chocolate Pound Cake
- Cream Butter Slowly: I learned this the hard way—dumping cold butter into sugar and whipping it all at once just makes a greasy mess. Instead, add the butter 1 tablespoon at a time while mixing on medium-high, letting each addition blend fully before adding more. This creates a smoother batter and lighter crumb (yes, even in dense pound cake).
- Sift the Cocoa: Unsweetened cocoa powder clumps like a stubborn teen. Sift it with the dry ingredients to break up those lumps and distribute it evenly—this prevents bitter pockets in your cake. Skip this, and you’ll get random chocolatey surprises that aren’t nice.
- Bake Until Springy: A toothpick test is overrated for pound cake. Press the center lightly with your finger—it should spring back immediately (no jiggle). Overbaking dries it out, but underbaking leaves it gummy. Pull it when the edges are set but the middle still feels slightly yielding.
- Brush with Simple Syrup: This isn’t the prettiest method, but it’s the tastiest. After baking, brush the warm cake with 2 tablespoons of warm simple syrup (equal parts sugar and water) while still in the pan. It keeps the cake moist for days—no one will guess you didn’t bake it yesterday.
Pro cooking tips for award winning chocolate pound cake
Butter Temperature Matters
The butter must be room temperature—this is non-negotiable for proper creaming. Cut your 1.5 cups unsalted butter into small cubes and let it sit at room temperature for at least 1 hour before starting. I test it by pressing a cube with my finger—it should dent slightly but not feel greasy. Cold butter won’t cream properly, leading to a dense, heavy cake. If your kitchen is cold, place the butter bowl on warm water for 5-10 minutes to speed up the process. 🧈
Creaming Time is Critical
Cream the butter and sugar for 5-7 minutes until light and fluffy—this isn’t just about mixing, it’s about incorporating air. Use a stand mixer with the paddle attachment on medium speed and scrape the bowl every 1-2 minutes to prevent uneven mixing. The mixture should hold soft peaks when you lift the paddle. If it’s grainy or doesn’t lighten, continue creaming—this step builds the cake’s signature tender crumb. 💛
Cocoa Dissolution Technique
Never just sprinkle cocoa powder into the batter—it’ll create streaks. Instead, whisk the 0.75 cup unsweetened cocoa powder with 0.5 cup hot water until completely smooth. This creates a cocoa paste that blends seamlessly. Use high-quality Dutch-processed cocoa like Valrhona or Ghirardelli—cheaper brands can taste bitter or chalky. The hot water also helps activate the baking powder for better rise. ✨
Baking Pan Prep Prevents Sticking
Grease your 9-inch round cake pans generously with butter, then line the bottoms with parchment paper cut to fit. This prevents sticking and ensures clean edges. I also dust the bottoms lightly with powdered sugar before adding the batter—this creates a non-stick barrier that makes removal effortless. Place the pans on a baking sheet to catch any drips, especially important for this rich batter. 🔥
Low-and-Slow Baking Wins
Bake at 325°F—this lower temperature prevents cracking while allowing even cooking. The cake is done when a toothpick comes out with moist crumbs (not wet batter) after 50-55 minutes. Overbaking is the #1 mistake—it dries out the cake. For extra insurance, tent the pans with foil if the tops brown too quickly. The cake will continue setting as it cools, so don’t rush the process. ⏰
Resting Batter Eliminates Cracks
Let the batter rest for 10 minutes before baking—this allows the flour to fully hydrate and creates a more uniform crumb. I also recommend placing the pans in a warm oven for 5 minutes before baking to help the cake rise smoothly. This simple step prevents the dreaded cracks that ruin so many pound cakes. The result? A perfectly domed, crack-free top every time. 💫
Nutrition facts
Frequently asked questions
Why does this cake need both all-purpose and cake flour?
The combination creates the perfect texture—all-purpose flour provides structure while cake flour keeps it tender and moist. Cake flour has a lower protein content, which prevents a tough crumb. This blend gives you that signature dense yet velvety texture that wins competitions.
Can I make this cake in a different pan size?
For best results, stick to 9-inch round pans—this gives you the classic pound cake shape. If you must use another size, adjust baking time by 10-15 minutes per inch difference. For example, an 8-inch pan would need about 40-45 minutes at 325°F. Always check doneness with a toothpick.
What's the secret to preventing cracks?
Three key steps: 1) Let the batter rest for 10 minutes before baking, 2) Use room-temperature ingredients (especially butter and eggs), and 3) Bake at 325°F—not too hot. The slow bake allows even cooking without surface drying. Also, avoid opening the oven door during the first 30 minutes of baking.
How do I store leftovers to keep them moist?
Wrap the cake tightly in plastic wrap and store at room temperature for 3-4 days. For longer storage, refrigerate for up to 1 week or freeze slices for 3 months. To revive, let slices sit at room temperature for 10-15 minutes before serving. The powdered sugar dusting helps preserve moisture too.
Can I substitute Dutch-processed cocoa?
Only if you want a slightly different flavor. Dutch-processed cocoa (like in this recipe) is smoother and less acidic, but natural cocoa gives a brighter, more intense chocolate taste. If substituting, reduce baking powder to 1 teaspoon since natural cocoa is more acidic. The hot water technique still applies for even distribution.