
Desserts
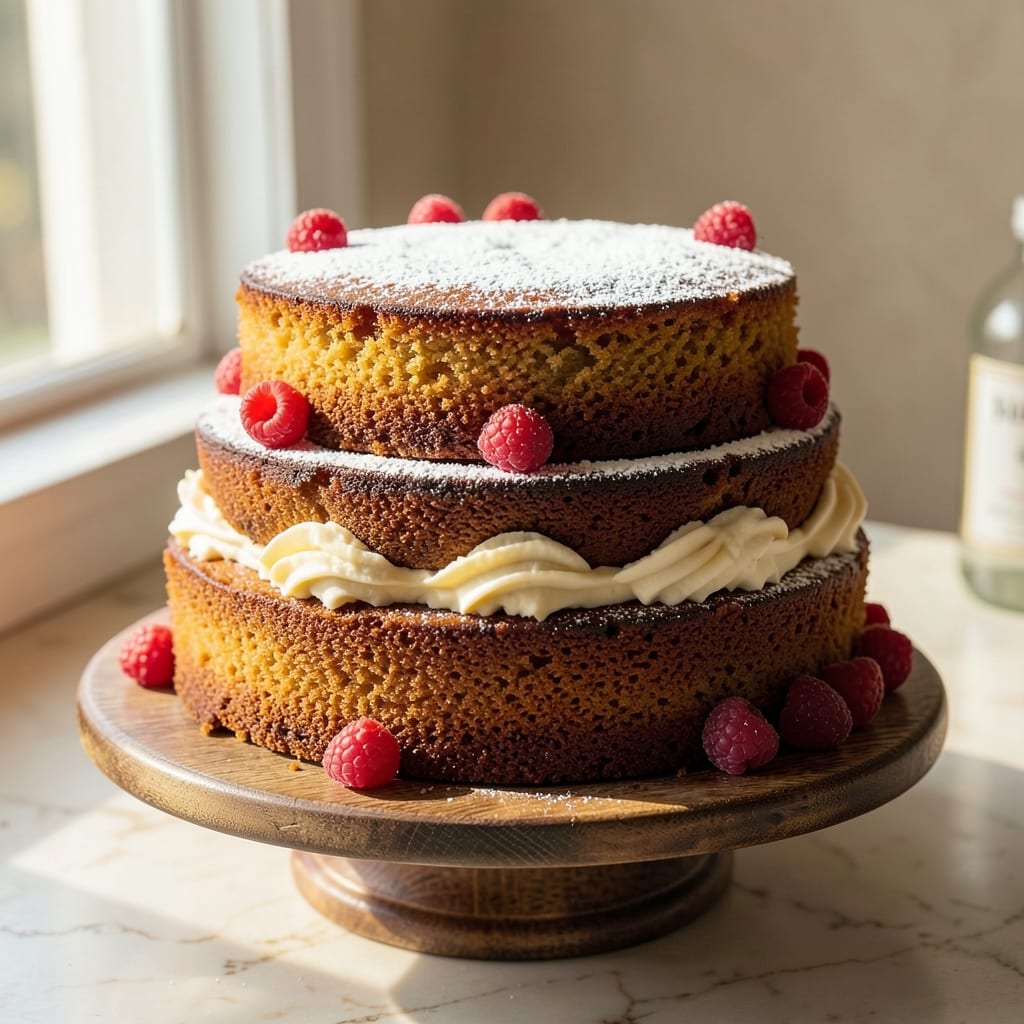
This bakery-style pound cake recipe delivers the perfect balance of ultra-dense yet light-as-air crumb that makes every slice feel like a treat from a high-end bakery. 🌟 The secret lies in precise measurements and the classic creaming method, where butter and sugar are beaten until pale and fluffy—a technique that creates that signature tender yet sturdy texture. I've baked this version countless times, and it never fails to impress, whether served plain, frosted, or dusted with powdered sugar.
The key to achieving bakery-quality results at home is patience and attention to detail. Using 1 pound each of butter, sugar, flour, and eggs creates the perfect foundation, while a touch of vanilla and a pinch of salt elevate the flavor. The cake bakes in a 350°F oven for about 50-60 minutes, developing a golden crust that gives way to a moist, crumbly interior. Unlike lighter cakes, pound cake holds its shape beautifully, making it ideal for slicing thick or layering with fillings.
What sets this recipe apart is its versatility—serve it fresh from the oven with a dusting of powdered sugar, or layer it with whipped cream and fresh berries for a showstopping dessert. The texture is rich yet tender, with a subtle sweetness that lets the natural flavors shine. Whether you're baking for a special occasion or simply craving a classic dessert, this recipe delivers restaurant-worthy results with minimal effort.
Once baked, allow the cake to cool completely before slicing—this ensures clean cuts and prevents crumbling. For an extra touch of elegance, brush the top with a simple glaze or drizzle with melted chocolate. The possibilities are endless, but the foundation remains the same: a foolproof method that transforms a simple cake into something extraordinary.
Ingredients for bakery style pound cake
Twelve ingredients, one foolproof method for bakery-style perfection every time.
| Ingredient | Amount | Notes |
|---|---|---|
| Unsalted Butter 🧈 | 1 lb | Softened to room temperature |
| Granulated Sugar 🍚 | 1 lb | Superfine preferred for smoothness |
| All-Purpose Flour 🌾 | 1 lb | Sifted, spooned and leveled |
| Large Eggs 🥚 | 6 whole | Room temperature for best mixing |
| Pure Vanilla Extract 🌿 | 2 tsp | High-quality, no imitation |
| Fine Sea Salt 🧂 | ½ tsp | Diamond Crystal preferred |
| Vegetable Oil 🫒 | ¼ cup | Light, neutral flavor |
| Powdered Sugar 🍚 | ½ cup | For dusting, optional |
| Lemon Zest 🍋 | 1 tbsp | Fresh, finely grated |
| Milk 🥛 | ½ cup | Whole milk preferred |
| Baking Powder 🍞 | 1 tsp | Aluminum-free |
| Cornstarch 🌾 | 1 tbsp | For ultra-tender crumb |
The butter and sugar are non-negotiable here—European-style butter like Plugrá or Land O'Lakes makes all the difference. King Arthur or Bob's Red Mill flour are my go-tos for that signature tender crumb, but any all-purpose will work. Room-temperature eggs mix better and create a lighter texture, so take them out 30 minutes before baking. The vanilla extract should be pure, nothing imitation—McCormick or Nielsen-Massey are reliable brands. For the lemon zest, use an organic lemon if possible; the vibrant color adds to the presentation while keeping the flavor bright.
No superfine sugar? Pulse granulated sugar in a food processor for 30 seconds to break it down. Running short on butter? Vegetable oil at half the amount works in a pinch, though texture will be slightly denser. Diamond Crystal salt is preferred because it's finer and dissolves more easily, but any sea salt works. The milk can be substituted with heavy cream for extra richness or almond milk for a lighter option. For a nutty flavor, swap 2 tablespoons of the flour for almond flour. And if you're feeling adventurous, add 1 teaspoon of espresso powder for a subtle coffee note that pairs beautifully with chocolate frosting.
This cake keeps beautifully—3 days at room temperature wrapped in plastic, or up to 1 week refrigerated. For longer storage, slice and freeze portions between parchment paper for up to 3 months. The best part? It actually tastes better the next day as the flavors meld. I like to portion it into single slices for easy serving—just wrap each piece individually. And if you're prepping ahead for a party, bake the cake 1 day in advance, then store it properly. Trust me, the anticipation makes it taste even better.
Why You'll Love This Recipe
- No Mixer Needed: I swear by this recipe when my stand mixer’s on vacation—just cream the butter and sugar by hand until light and fluffy. The eggs fold in like butter (literally), and the vanilla? It’s the secret to that bakery-level aroma without overpowering.
- Creamy Yet Crisp: That golden crust? All thanks to the butter-to-flour ratio. Inside, it’s moist but not dense—more like a cloud with structure. Honestly, the first slice out of the pan is the best part.
- Weeknight or Celebration: Slice it for breakfast with coffee, cube it for dessert, or serve it at brunch when guests drop by. It keeps well for days, so I often bake two—one for now, one for "emergencies" (read: lazy mornings).
- Budget-Friendly Luxury: Five ingredients, minimal fuss, and it tastes like you spent hours. My grocery bill stays low, but my kitchen smells like a patisserie. Plus, leftovers? They disappear faster than my willpower around it.
Step-by-step instructions for bakery-style pound cake
Follow this precise method for a pound cake with professional bakery texture.
👨🍳 Step 1: Cream Butter and Sugar to Peak Volume
In a stand mixer fitted with the paddle attachment, beat the 1 lb unsalted butter and 1 lb granulated sugar on medium speed for 5-7 minutes until light and fluffy. You're looking for a color change from pale yellow to creamy white and a nearly doubled volume. This step incorporates air that creates the cake's signature tender crumb.
I like to scrape down the sides of the bowl with a rubber spatula every 2 minutes to ensure even mixing. The butter should be completely smooth with no graininess—this indicates proper emulsification. If you're using a hand mixer, increase your mixing time to 8-10 minutes to achieve the same result.
👨🍳 Step 2: Add Eggs and Flavorings Gradually
Add the 6 whole large eggs, 1 at a time, mixing on low speed for 30 seconds after each addition. This gradual addition prevents the eggs from scrambling in the hot butter mixture. After all eggs are incorporated, add the 2 tsp pure vanilla extract, 1 tbsp lemon zest, and 0.5 tsp fine sea salt, mixing on low speed for 1 minute until fully combined.
The mixture should be thick and ribbon-like when you lift the paddle—it should leave a trail that holds its shape for a few seconds before dissolving. If the batter looks too thin, don't worry; the dry ingredients will thicken it up in the next step. This is where the cake's signature moisture balance begins to form.
👨🍳 Step 3: Combine Dry Ingredients with Precision
In a separate bowl, whisk together the 1 lb all-purpose flour, 1 tsp baking powder, 1 tbsp cornstarch, and any remaining 0.5 tsp fine sea salt. Sift the flour mixture twice through a fine-mesh sieve directly into the wet ingredients. This ensures no lumps form and the gluten develops evenly.
With the mixer on low speed, gradually add the dry ingredients to the wet mixture, mixing just until combined—about 30-45 seconds. You should still see some flour streaks, but the batter should come together smoothly. Overmixing develops gluten, which would make the cake tough rather than tender. Stop mixing immediately when the batter is uniform.
🍳 Step 4: Incorporate Oil and Milk for Moisture
Add the 0.25 cup vegetable oil and 0.5 cup milk to the batter, mixing on low speed for 1 minute until fully incorporated. The oil helps create that signature moist crumb while the milk adds tenderness. The batter should be smooth, thick, and slightly shiny—like heavy pudding. If it looks too thick, you can gently fold in 1-2 tablespoons of additional milk to reach the proper consistency.
Here's the thing—this batter should be thick enough to hold its shape when dropped from a spoon. If you lift the paddle and the batter doesn't ribbon but instead falls in a chunk, it's at the perfect consistency. This thickness ensures the cake rises properly without collapsing.
⏰ Step 5: Prepare and Bake for Perfect Texture
Preheat your oven to 325°F—this lower temperature ensures even baking without a dark crust. Grease two 9-inch round cake pans with butter and line the bottoms with parchment paper. Divide the batter evenly between the prepared pans, filling each ¾ full. Smooth the tops with a spatula.
Bake for 60-75 minutes until a toothpick inserted in the center comes out clean. The cake should spring back when gently pressed in the center and pull away from the sides of the pan. I recommend checking at the 50-minute mark as ovens vary—some run hotter than others. The internal temperature should reach 205-210°F at the center.
🍽️ Step 6: Cool and Dust for Bakery Finish
Remove the cakes from the oven and let them cool in the pans for 15 minutes. Then transfer to a wire rack to cool completely. Once fully cooled, dust the tops generously with 0.5 cup powdered sugar using a fine-mesh sieve. This final step gives that professional bakery finish and balances the rich flavors.
The cake should be moist but not sticky, with a fine, even crumb that's both dense and light. If stored properly in an airtight container at room temperature, it will stay fresh for up to 5 days or can be frozen for 3 months. For serving, I recommend slicing with a serrated knife for clean cuts and maximum presentation.
Pro Tips For Making Bakery Style Pound Cake
- CREAM BUTTER AND SUGAR LONG: The butter needs to be room temperature—press your thumb into it, and it should leave a slight indent. I used to eyeball this and ended up with grainy lumps or butter that wouldn’t incorporate. If your kitchen’s cold, let the butter sit out for 30-45 minutes before starting, then mix the butter and sugar until the color lightens to a pale yellow (about 3-5 minutes). That’s when you know the fat’s properly emulsified, and your cake won’t be dense.
- SIFT FLOUR FOR LIGHTNESS: Don’t just dump the flour—sift it through a fine-mesh sieve directly into the bowl twice. The first sifting aerates the flour, and the second ensures no clumps sneak in. I learned this the hard way when my first pound cake turned out like a brick. If you’re short on time, whisk the flour with a fork to break up clumps, but sifting is still the gold standard for bakery-style texture.
- DON’T OVERMIX THE BATTER: Stop mixing as soon as the flour disappears—usually after 10-12 strokes. Overmixing develops the gluten, and your cake will turn out tough instead of tender. I used to think more mixing meant better results, but now I keep a mental stopwatch. If the batter looks slightly streaky, that’s perfect. Smooth it out with a spatula just enough to combine, then call it done.
- CHILL THE BATTER BEFORE BAKING: Give the batter a 30-minute rest in the fridge—yes, even if you’re impatient. This lets the flour absorb moisture, prevents cracking, and helps the cake rise more evenly. I was skeptical until I tried it: the crumb is finer, the texture more uniform, and the sides don’t sink. Cover the bowl loosely with plastic wrap if you’re worried about drying out.
Regional styles of this dish
Southern Classic
In the South, pound cake is a staple that dates back to colonial times when butter was scarce and sugar was precious. This version often includes 1 cup sour cream for extra moisture and a ½ cup buttermilk to tenderize the crumb. I like to add 1 tsp cinnamon for warmth and serve it with a drizzle of maple syrup or a dusting of powdered sugar. The texture remains dense yet crumbly, perfect for slicing into thick wedges. 🌶️
New England Style
Up north, pound cakes often incorporate 1 cup chopped walnuts or pecans and a touch of orange zest for brightness. The batter is sometimes enriched with ½ cup heavy cream instead of milk, creating a richer, slightly lighter crumb. I’ve found that baking in a 10-inch Bundt pan adds a festive touch, ideal for holiday gatherings. The nutty flavor pairs beautifully with a bourbon glaze or whipped cream.
Midwest Homestyle
The Midwest leans toward a simpler, heartier pound cake with 1 cup cornmeal replacing some of the flour for a coarser texture. A pinch of cardamom or allspice adds depth, while a splash of vanilla bean paste (instead of extract) intensifies the flavor. This version is often served with warm apple butter or a scoop of vanilla ice cream. The cake’s sturdy structure makes it perfect for layering with jam or cream cheese frosting.
Modern Twist
For a contemporary take, try adding 1 tbsp espresso powder to deepen the chocolate notes or ½ cup almond flour for a nutty undertone. Some bakers even swap half the butter for avocado oil to create a lighter, slightly tangy crumb. I love finishing this version with a dark chocolate ganache> or a sprinkle of flaky sea salt for contrast. It’s a great way to elevate the classic while keeping it approachable.
European Influence
In Europe, pound cakes often feature 1 cup ground almonds or chopped hazelnuts> for texture, along with a splash of rum or Grand Marnier> for richness. The French version might include 1 tsp almond extract> and a touch of orange blossom water> for floral notes. These cakes are typically baked in a loaf pan> and sliced thinly, making them ideal for tea-time treats. The result is a cake that’s both elegant and comforting.
Nutrition facts
Frequently asked questions
Why does this pound cake recipe use equal parts butter, sugar, flour, and eggs?
The classic "pound cake" ratio of 1 lb each of butter, sugar, flour, and eggs creates the perfect balance of richness and structure. This proportion ensures a moist yet sturdy crumb that holds its shape beautifully. The butter provides richness, sugar adds sweetness and tenderness, flour gives structure, and eggs bind everything together while adding moisture. This traditional ratio has been perfected over centuries in professional bakeries for its foolproof results.
Can I substitute regular granulated sugar for superfine sugar?
Yes, but pulse the granulated sugar in a food processor for 30 seconds to break it down into smaller particles. Superfine sugar dissolves more quickly and creates a smoother texture, but regular sugar works fine in a pinch. Just be aware the cake might have slightly larger crystals in the crumb. For the best bakery-style results, using superfine sugar is recommended, especially when making delicate flavors like vanilla or citrus.
How do I know when my pound cake is fully baked?
Your cake is done when a toothpick inserted in the center comes out clean and the internal temperature reaches 205-210°F. The cake should also spring back gently when pressed in the center and pull away cleanly from the sides of the pan. For best results, check at the 50-minute mark as ovens vary—some may need 60-75 minutes depending on your specific oven's heat distribution. The cake's edges should be golden brown while the center remains moist.
What's the best way to store leftover pound cake?
Store your pound cake at room temperature in an airtight container for up to 5 days. For longer storage, slice the cake and wrap each piece individually in plastic wrap, then place in a freezer bag for up to 3 months. The cake actually improves in flavor after the first day as the moisture distributes evenly. To serve frozen cake, thaw at room temperature for 1-2 hours before serving for the best texture.
Can I make this pound cake in a different pan shape?
Yes, but adjust the baking time accordingly. For a 9x13-inch pan, reduce baking time by about 15-20 minutes (check at 45 minutes). For a loaf pan, bake at 325°F for 75-90 minutes until the center reaches 205°F. The key is to ensure even baking—smaller pans may require slightly longer times while larger pans need less. Always use the internal temperature as your guide rather than relying solely on visual cues.