
Desserts
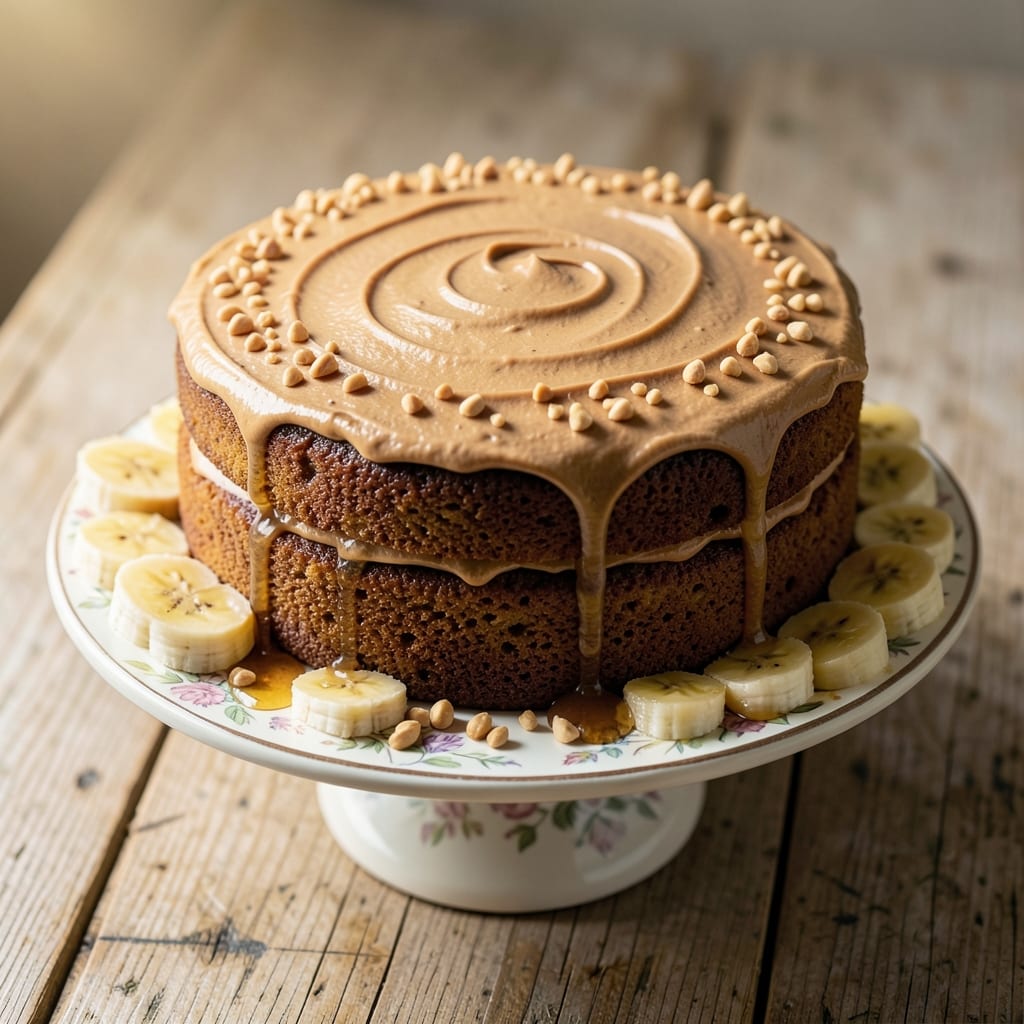
This banana cake recipe with peanut butter frosting delivers the perfect balance of moist, tender layers and rich, nutty cream cheese swirls—every bite is a comfort food dream. 💛 The secret lies in overripe bananas and a gentle folding technique that keeps the cake light yet dense, while the peanut butter frosting adds a velvety contrast that makes it impossible to stop at one slice.
What sets this recipe apart is the combination of classic banana cake with a creamy peanut butter frosting that's both sweet and subtly salty. The cake bakes up with a golden top and tender crumb, while the frosting—made with cream cheese for stability—pairs beautifully with the warm banana flavor. It's the kind of dessert that feels indulgent yet simple to make.
The result is a cake that's perfect for celebrations or a cozy weekend treat, with each forkful offering layers of flavor and texture. The frosting isn't just sweet; it's rich and slightly tangy, cutting through the cake's natural sweetness. Whether you're baking for a crowd or just craving a slice, this recipe delivers restaurant-quality results at home.
Ready in about 1 hour, this banana cake is ideal for beginners and experienced bakers alike. The frosting comes together in minutes, and the cake's simplicity makes it a reliable favorite. Let's get baking!
Ingredients for banana cake recipe with peanut butter frosting
Gather these familiar ingredients for a banana cake with velvety peanut butter frosting that feels indulgent yet simple.
| Ingredient | Amount | Notes |
|---|---|---|
| Ripe Bananas 🍌 | 3 whole | Overripe, mashed thoroughly |
| All-Purpose Flour 🌾 | 2 ½ cups | Sifted for light texture |
| Granulated Sugar 🍚 | 1 ½ cups | White or light brown |
| Brown Sugar 🍚 | ½ cup | Packed, for moisture |
| Unsalted Butter 🧈 | 1 cup | Room temperature, softened |
| Large Eggs 🥚 | 2 whole | Room temperature |
| Vanilla Extract 🌸 | 2 tsp | Pure, high-quality |
| Baking Soda 🧂 | 1 tsp | Not baking powder |
| Salt 🧂 | ½ tsp | Fine sea salt |
| Cream Cheese 🧀 | 8 oz | Room temperature, full-fat |
| Peanut Butter 🥜 | 1 cup | Creamy, natural |
| Powdered Sugar 🍚 | 3 cups | For frosting |
| Milk 🥛 | ½ cup | Whole milk preferred |
| Lemon Juice 🍋 | 1 tbsp | Freshly squeezed |
The bananas are the star—look for black-spotted, mushy ones from the grocery store's produce section. They're sweeter and add natural moisture. Costco or Trader Joe's often have great deals on organic bananas, but any overripe ones will work. The cream cheese matters too—Philadelphia brand is reliable, but any full-fat cream cheese will do. For the peanut butter, natural, unsweetened gives the best flavor, though regular creamy works in a pinch. The frosting's tangy-sweet balance comes from the lemon juice, so don't skip it.
No ripe bananas? Frozen bananas work perfectly—thaw and mash them first. Substituting peanut butter? Almond butter or cashew butter adds a different but delicious flavor. For a lighter cake, replace half the all-purpose flour with whole wheat flour (though texture will be denser). The frosting can be made ahead—it actually tastes better the next day as flavors meld. If you're avoiding dairy, use vegan cream cheese and milk alternatives, though the texture will differ slightly.
Store cake layers wrapped in plastic at room temperature for up to 2 days, or refrigerate for 5 days. The frosting keeps well in the fridge for 1 week, though it softens at room temperature. For best results, assemble the cake 1-2 hours before serving—this lets the frosting set properly. Leftovers? Slice and freeze between parchment paper for up to 3 months. The cream cheese frosting actually improves overnight, so make it a day ahead if possible.
Why You'll Love This Recipe
- No Overripe Waste: I always keep a stash of brown-speckled bananas in the fruit bowl—this recipe turns them into something magical. Mash them right in the bowl with butter and sugar, and suddenly you’ve got a cake that’s moist, tender, and actually uses up what would’ve ended up in the trash.
- Peanut Butter Magic: That creamy peanut butter frosting isn’t just an afterthought—it’s the star. The brown sugar in the cake caramelizes just enough to play perfectly with the nutty, slightly sweet frosting. Honestly, I’ve had people ask for the recipe just for the frosting alone.
- Weeknight Hero: Mix the batter while the coffee brews, pop it in the oven, and by the time you’re done with your morning routine, it’s ready. No fancy layers, no waiting for dough to rise—just a warm, gooey cake that’s out of the oven in under an hour. (Yes, even on a Tuesday night.)
- Budget-Friendly Indulgence: This cake costs me pennies to make but tastes like a bakery treat. Brown sugar and ripe bananas stretch every ingredient, and the peanut butter frosting? Just powdered sugar, peanut butter, and a splash of milk. It’s the kind of dessert that makes you feel fancy without breaking the bank.
Step-by-step instructions for banana cake with peanut butter frosting
Here's how to create layers of moist banana cake with creamy peanut butter swirls.
👨🍳 Step 1: Prepare the Banana Cake Batter
Preheat your oven to 350°F and grease two 9-inch round cake pans or line them with parchment paper. In a large mixing bowl, mash the 3 whole ripe bananas thoroughly with a fork until completely smooth - no lumps should remain. This ensures even texture throughout the cake.
In a separate bowl, cream together the 1 cup unsalted butter and both sugars (1.5 cups granulated sugar and 0.5 cup brown sugar) on medium speed until light and fluffy, about 3-4 minutes. The mixture should nearly double in volume and become pale. This step incorporates air that creates the cake's tender crumb.
Add the 2 whole eggs one at a time, mixing well after each addition. Stir in the 2 teaspoons vanilla extract and 1 tablespoon lemon juice. The lemon juice brightens the banana flavor while adding moisture. In another bowl, whisk together the 2.5 cups all-purpose flour, 1 teaspoon baking soda, and 0.5 teaspoon salt.
🥘 Step 2: Combine Wet and Dry Ingredients
Gradually add the dry ingredients to the wet mixture, mixing on low speed just until combined. Be careful not to overmix - stop as soon as the flour disappears. The batter should be thick but pourable. If it seems too thick, add the 0.5 cup milk gradually until smooth.
Divide the batter evenly between the prepared cake pans. For the signature swirl effect, drop spoonfuls of the peanut butter mixture (see next step) onto the batter in each pan, then gently swirl with a knife to create marbled patterns. This creates those beautiful peanut butter ribbons throughout each slice.
👨🍳 Step 3: Prepare the Peanut Butter Swirl Filling
In a small bowl, combine the 8 ounces cream cheese and 1 cup peanut butter until completely smooth. The cream cheese should be at room temperature for easy mixing. Add the 3 cups powdered sugar gradually while mixing until the filling reaches a thick but spreadable consistency.
This peanut butter cream is the star of this cake. The cream cheese adds richness while balancing the sweetness, and the powdered sugar gives it that perfect frosting texture. If the mixture seems too thick, add a splash of milk to loosen it. The filling should be smooth enough to pipe but thick enough to hold its shape.
🔥 Step 4: Bake the Cake Layers
Bake the cakes for 25-30 minutes or until a toothpick inserted into the center comes out clean. The edges should be golden brown while the top may have a few moist spots. Rotate the pans halfway through baking for even cooking.
Let the cakes cool in their pans for 10 minutes before transferring to a wire rack to cool completely. This gradual cooling prevents cracking. While the cakes cool, prepare your serving plates or cake stand. The cooling process allows the cakes to set properly for slicing and layering.
🥘 Step 5: Assemble and Frost the Cake
Once completely cool, place one cake layer on your serving plate or stand. Spread a generous layer of the peanut butter cream over the top, leaving a small border. Place the second cake layer on top and press gently. Spread the remaining peanut butter cream over the entire cake, creating a smooth surface.
For extra decoration, pipe additional peanut butter cream around the edges or create swirls on top. The cake should have a thick, creamy frosting that's rich but not overly sweet. Chill the cake in the refrigerator for 30 minutes before slicing to help the frosting set and make serving easier.
Pro Tips For Making Banana Cake Recipe With Peanut Butter Frosting
- Mash Bananas First: I learned this the hard way—adding whole bananas to the batter means lumpy cake. Mash them with a fork until smooth, then mix in the wet ingredients. That way, the texture stays consistent, and the cake won’t have those awkward banana chunks hiding in every bite.
- Use Room-Temp Butter: Cold butter makes the cake dense, and nobody wants that. Let your unsalted butter sit out for 30-60 minutes before creaming it with the sugars. It’ll blend smoother and create a lighter crumb—trust me, your fork will thank you.
- Don’t Overmix the Batter: Once you fold in the flour, stop mixing the second everything comes together. Overworking the batter makes the cake tough, and we’re going for tender, moist layers here. Just until combined—no need to turn it into a science experiment.
- Toast the Peanut Butter: Sounds weird, but it works: Spread a thin layer of peanut butter on a baking sheet and warm it in the oven (200°F for 5-7 minutes) before mixing it into the frosting. The heat deepens the flavor and makes the frosting creamier—no weird graininess, just pure peanut butter goodness.
Make-ahead tips for this banana cake recipe with peanut butter frosting
Batter Prep Ahead
Mix the banana cake batter up to 24 hours in advance and store it in an airtight container in the refrigerator. The flavors deepen overnight, and the batter thickens slightly—just stir in 1-2 tablespoons of milk before baking if it seems too stiff. I always make mine the night before so the cake has more time to develop its rich banana flavor. 💛
Frosting Make-Ahead
The peanut butter frosting is even better made ahead! Whip it up 1-2 days in advance and store it in an airtight container at room temperature. The flavors meld beautifully, and the texture becomes ultra-smooth. If you're worried about softening, refrigerate it for up to 5 days—just let it sit at room temperature for 15-20 minutes before using to soften.
Layer Assembly Strategy
Assemble the cake layers 4-6 hours before serving—this gives the frosting time to set properly and prevents a soggy bottom. Place the assembled cake on a wire rack over a baking sheet to catch any drips. For extra stability, chill the cake in the fridge for 30 minutes before slicing. This trick ensures clean cuts and prevents crumbs.
Freezer-Friendly Layers
Freeze the baked cake layers (unfrosted) for up to 3 months in plastic wrap followed by aluminum foil. Thaw completely at room temperature before assembling. The frosting can be made fresh after thawing, or use your pre-made frosting straight from the fridge—just let it soften slightly before spreading. This method saves time when you're short on baking days. ❄️
Portioning for Parties
For large gatherings, bake and freeze individual cake layers in parchment-lined loaf pans—they stack neatly and thaw quickly. Frost each layer individually with 2-3 tablespoons of peanut butter cream before serving. This approach keeps the cake fresh-tasting even when prepped ahead. I’ve hosted birthday parties with this technique and never had leftovers! 🎉
Storage Hacks
Keep the fully frosted cake in the fridge for up to 5 days in an airtight container with parchment paper between layers. For longer storage, freeze the fully assembled cake (with frosting) for up to 2 months**. Thaw overnight in the fridge before serving. The frosting actually holds up better when frozen—no soggy texture here! 🧊
Nutrition facts
Frequently asked questions
Can I use frozen bananas instead of fresh?
Yes! Thaw frozen bananas completely first, then mash them just like fresh ones. The texture works perfectly and saves money. Just ensure there's no ice remaining—this can make your batter too watery. For best results, use bananas that were previously ripe before freezing.
How do I make this recipe gluten-free?
Replace the 2.5 cups all-purpose flour with a 1:1 gluten-free baking flour blend like Bob's Red Mill. Add 1 teaspoon xanthan gum to help bind the cake. The texture will be slightly denser but still moist. For the frosting, use a gluten-free powdered sugar if needed.
Why did my cake turn out dense instead of light?
Overmixing the batter or using underripe bananas are common culprits. Always mix just until combined, and use very ripe bananas (black spots). Another tip: don't overfill your pans—batter should come 2/3 up the sides of 9-inch pans. Also ensure your baking soda is fresh.
Can I make this cake in a single layer instead of two? Use one 9-inch pan and bake for 35-40 minutes. The frosting will still work perfectly—just
What's the best way to store leftovers?
Wrap individual slices in plastic wrap and store in an airtight container at room temperature for 2 days. For longer storage, freeze slices between parchment paper for up to 3 months. Thaw at room temperature for 1-2 hours** before serving. The frosting stays creamy when properly stored!